Phase2 UI: Group Cloning Tutorial
This tutorial is an example walk-through about using the Group Cloning Tool to copy the attributes of a group to create a new group, which can then be changed to suit its new purpose. In this example there is only one target or "slew component" defined in the initial existing group. If the group you wish to clone has many slew components within its observation sequence, the cloning dialogue will be slightly different from the example discussed here, as the targets to be specified in the clone will have to be edited manually using the observation sequence editor.
![]() We begin by assuming that you have already created the GROUP
structure along with timing and observing constraints and observation
sequence.
We begin by assuming that you have already created the GROUP
structure along with timing and observing constraints and observation
sequence.
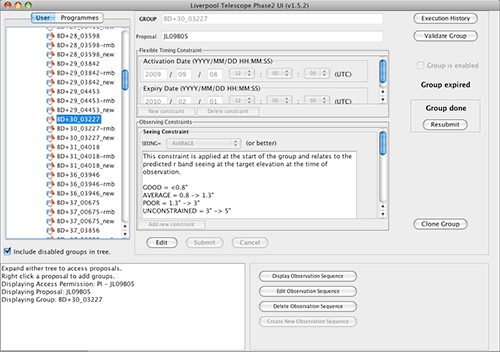
![]() Start from the GROUP editing dialogue screen which allows you
to add, delete and edit all aspects of the group scheduling. Select
your group in the tree on the left hand panel (see below):
Start from the GROUP editing dialogue screen which allows you
to add, delete and edit all aspects of the group scheduling. Select
your group in the tree on the left hand panel (see below):
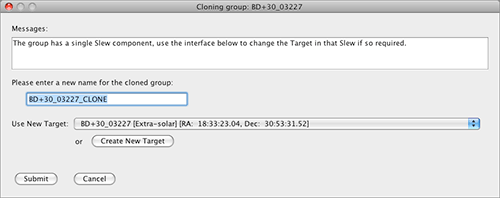
![]() In order to clone the constraints, attributes and observation
sequence of this group, click the "Clone Group"
button. This will bring up the group cloning dialogue. The text and
controls offered in this dialogue will differ depending on the status
of the group being cloned. If the group has no associated observation
sequence, the dialogue will only offer you the ability to edit the
name of the new group. However, if the group has only one slew
component (target) within its observation sequence, a dialogue similar
to the following is shown:
In order to clone the constraints, attributes and observation
sequence of this group, click the "Clone Group"
button. This will bring up the group cloning dialogue. The text and
controls offered in this dialogue will differ depending on the status
of the group being cloned. If the group has no associated observation
sequence, the dialogue will only offer you the ability to edit the
name of the new group. However, if the group has only one slew
component (target) within its observation sequence, a dialogue similar
to the following is shown:
![]() The above dialogue includes a text box for you to enter the
name of the newly cloned group. By default this is initially set to
the name of the original group, with the post-fix "_CLONE".
The above dialogue includes a text box for you to enter the
name of the newly cloned group. By default this is initially set to
the name of the original group, with the post-fix "_CLONE".
![]() As previously stated, the observation sequence of the original
group only has one slew component within it (i.e. one target is
specified within the sequence). In this common circumstance, the
dialogue makes it easy to change the target to be slewed to in the
newly created group. Use the drop-down combo box to select a different
target (from within the same programme) or use the "Create New Target"
button to create a new target to use.
As previously stated, the observation sequence of the original
group only has one slew component within it (i.e. one target is
specified within the sequence). In this common circumstance, the
dialogue makes it easy to change the target to be slewed to in the
newly created group. Use the drop-down combo box to select a different
target (from within the same programme) or use the "Create New Target"
button to create a new target to use.
![]() Once you have selected a target to use (or kept the same
target) click "Submit" to create the new group with the parameters
specified.
Once you have selected a target to use (or kept the same
target) click "Submit" to create the new group with the parameters
specified.
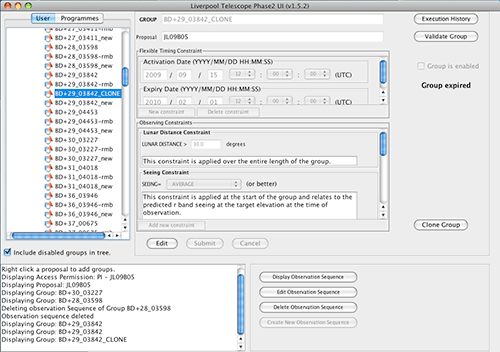
![]() The new group with the name you have specified, will be added
to the database and afterwards displayed within the object tree in the
left hand side of the main UI screen (see below):
The new group with the name you have specified, will be added
to the database and afterwards displayed within the object tree in the
left hand side of the main UI screen (see below):


